

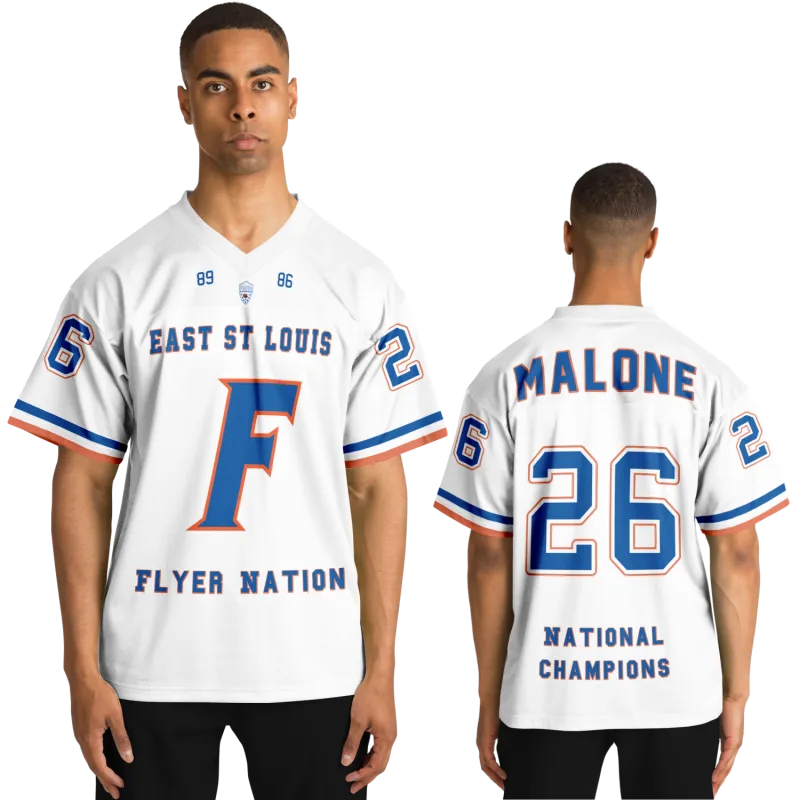
Most former baseball players have a specific drawer. It holds nothing useful — an old program from junior year, a scorecard in someone else's handwriting, and a photograph taken from the third-base line where you can almost make out the number on your back.
The jersey itself is long gone. Outgrown, donated, or borrowed by someone who never returned it. But that photograph stays. And it keeps asking the same question.
If you've come here to figure out how to make a baseball jersey that captures what you wore at 17 — not approximately, faithfully — this guide was written for you. Not for a coach ordering twenty-four units for a travel team. Not for a graphic designer building from a blank canvas. For the one player who wants the one jersey back, and wants every detail done right.
By the end of this guide, you'll have a complete, step-by-step process for rebuilding every design element from your original uniform — even if all you have is one overexposed photo, a partial memory, and the number you still think about every time you watch a game.
The Problem With How Most Guides Approach This
Search "make a baseball jersey" and you'll find two categories of content: bulk-order FAQ pages built for equipment managers ordering two dozen units, and generic customization walkthroughs that assume you're starting from nothing.
Neither one is built for the player trying to reconstruct a specific design from memory and old photographs.
That is a fundamentally different problem. You are not inventing a design — you are recovering one. The number already exists in your memory. The color is specific, not approximate. The font on your last name had a particular weight. The pinstripes on your old team's uniforms sat at a particular spacing — closer in spirit to the classic Yankees baseball jersey tradition than a wide-stripe travel ball look, or maybe the reverse. Getting close isn't the goal. Getting it right is.
That requires a different starting point, a different set of questions, and a different process. This guide covers all three.
Step 1: Build Your Reference File Before You Touch Any Design Tool
This step determines everything that follows. Most players skip directly to a design platform, realize midway through that they cannot confirm the exact shade of the chest lettering, and end up with something that feels almost right — which is worse than feeling clearly different, because "almost right" is the version that bothers you every time you look at it.
Before you open any platform, build your reference file.
What to Gather
Photographs — every angle, every quality level. The dugout shot from a local newspaper. The team photo that's been on your parents' refrigerator for fifteen years. The blurry one from a 2009 flip phone. Even a photo that shows only half the jersey tells you something — the color of the side panel, whether the placket was two-button or full-button, the depth of the armhole cut.
Yearbooks and booster programs. High school yearbooks almost always include team photos in the athletics section. Print quality is often poor, but the design elements are readable: chest text style, number font, stripe configuration. Tournament programs from your playing years sometimes contain the sharpest photography of any available source.
Former teammates. This resource is consistently underused. Someone on your roster still has their jersey. Someone's parent shot video. Someone saved the program from the regional tournament. A group text to four people from your graduating class takes ninety seconds and regularly surfaces a photograph you had no idea existed.
Your school's current athletic department. Most players never think to try this. Many high school athletic offices maintain uniform archives specifically for design continuity — so the jerseys issued in 2031 carry the same identity as the ones from 2011. The current coach may have direct access to the template your team used.
What to Document From Each Photo
Once you have your reference materials assembled, go through them systematically and write down the following — not in your memory, but in a document you can open beside your design workspace:
- Base color and secondary color. White home, gray road, or a specific primary — the deep black of an Arizona Diamondbacks-inspired baseball jersey design, the classic red of an Atlanta Braves-style look? Note the main body and any contrast panels separately.
- Chest text style. Script or block? Arched across the chest or flat? How many colors in the lettering, and is there an outline or drop shadow?
- Number font. This is where most projects go wrong. The specific weight and outline configuration of your back number matters more than the general font category. Document exactly what you see, not what you think you remember.
- Stripe placement. Sleeve stripes, side seam stripes, or both? How many stripes, and are they equal width or a thick-thin-thick configuration?
- Placket style. Full-button front, two-button, or pullover? The placket changes the entire silhouette of a baseball jersey.
- Back layout. Name strip above the number, or number only? Same font as the chest lettering, or different? Number centered or sitting slightly low on the back?
A complete reference file takes about twenty minutes. It prevents three rounds of revision.
Step 2: Identify the Cut and Fabric Your Original Used
This is the step that separates a jersey that looks right from one that also feels right — and the difference is immediately noticeable the moment you put it on.
The Two Cuts That Define the Project
Traditional cut — higher armhole, looser through the body, longer shirttail. This is the silhouette that defined most baseball uniforms through the early 2000s. If you're rebuilding a jersey from before approximately 2010, this cut is almost certainly what you remember. It also forms the foundation of most classic professional designs — the SF giants baseball jersey silhouette, the Pittsburgh Pirates baseball jersey profile, and the throwback-style Chicago Cubs baseball jersey all draw from this same traditional structure.
Athletic cut — lower dropped shoulder, tapered torso, shorter overall length. More common in uniforms issued after about 2012. If your high school updated its uniform program during your playing years, your jersey may have shifted to this cut by your junior or senior season.
Pull up a reference photo from a side angle. A jersey that billows at the hip with a long tail visible below the belt is traditional cut. One that sits flush against the torso and barely clears the waistband is athletic cut.
Fabric
For a single custom baseball jersey design, the practical choice comes down to two options:
- Polyester mesh — the standard for authentic game feel. Breathable, durable, and the surface that accepts sublimated or embroidered lettering at the highest quality level.
- Polyester twill — slightly heavier, with a flatter matte surface. Used in many classic uniform programs, including the style behind older designs like a New York Mets baseball jersey from the 1980s or the traditional baseball jerseys White Sox wore in their button-front era.
In our experience, players rebuilding jerseys from the early 2000s and before almost always want polyester twill — mesh reads as subtly more modern and changes the way lettering sits on the chest. If your original felt substantial in hand, twill is the right call.
Step 3: Rebuild the Design Elements in the Right Order
The sequence matters here. Building in the wrong order forces you to redo earlier decisions when later elements don't align.
Start With the Number
The number is the most emotionally loaded element of your jersey — and the one most likely to be mishandled by platforms that default to generic athletic fonts. According to USA Baseball's uniform standards documentation, number legibility and placement follow consistent conventions across levels of play, which is useful context when you're trying to verify that your memory of size and position is accurate. Start with the number and build everything else around it.
The four classic baseball number font categories most players are trying to match:
- Varsity Block — clean, thick, no serif. Used by the large majority of high school programs through the 1990s and 2000s.
- Old English — used by programs drawing inspiration from the historic Yankees or Cubs tradition.
- Collegiate Arch — the number sits inside a slight curve, common in programs with a throwback identity.
- Shadow Block — a block number with a one-color drop shadow offset behind it. Very common in late-1990s uniform programs.
Compare your reference photo against these four. You'll identify yours in under two minutes. Select this font first on your design platform, then build the rest of the jersey around it.
Match the Color With a Professional Reference Point
"Navy" is not a color. There are eleven blues that could reasonably carry that name, and two of them are the difference between a jersey that looks like your team and one that looks like someone else's entirely.
The most reliable approach: identify the closest professional program that shares your team's color scheme and use it as a named reference point — not to copy a licensed design, but to give your custom jersey designer an anchor for the specific shade. The LA Dodgers baseball jersey home blue is a specific, well-documented color that many high school programs referenced when establishing their identity. The navy of an NY Mets baseball jersey pinstripe alternate sits distinctly darker. The deep charcoal-black of a San Francisco Giants baseball jersey reads differently still.
When you specify your color to a custom jersey design service, provide the closest professional reference by name and be clear that you want a tribute to your own team's palette — inspired by that color family, not a licensed design. A competent designer will understand immediately and match accordingly.
Reconstruct the Chest Lettering Last
Script or block was already documented in your reference file. Now apply it.
For block lettering, the key variables are letter height relative to chest width, outline thickness, and whether the text arches across the chest or runs flat.
For script lettering, the variables are the specific script family, whether there's an underline or decorative tail beneath the word, and the angle of the lean — baseball script typically leans right at roughly 10 to 15 degrees.
Most quality custom jersey platforms offer at least eight baseball-specific lettering options. If yours offers fewer than that, find a different platform. The chest lettering is too central to the project to compromise on a two-font library.
Step 4: Use Your Photo as a Design Layer, Not Just a Reference
Marcus T., 34, had exactly one photograph from his senior season — slightly overexposed, shot from the first-base side during a regional tournament. He could read the number (22), trace the arch of the chest lettering, and count two sleeve stripes. He uploaded that photo directly into his custom jersey platform's design workspace, used it as an overlay layer set at roughly 35% opacity, and built his tribute jersey on top of it element by element. The finished jersey honored his original to a degree he described as "embarrassing how much I care about this being right."
That overlay technique is available on most professional design platforms and almost never mentioned in standard tutorials. Here is the specific process:
- Upload your reference photo to the design canvas as a background or overlay layer. Most platforms support image uploads directly to the workspace.
- Set the opacity to 30–40% so both your reference and your active design are visible simultaneously.
- Match one element at a time — number first, then chest text, then stripes — toggling the reference layer on and off to compare at each stage.
- Remove the reference layer completely before finalizing. It should not appear in the production file — it is a construction guide, not a design component.
If your platform does not support overlay layers, keep the photo open on a second screen or print it and place it beside your monitor. The principle is identical: you are always comparing your work to your original, not building from imagination.
When You Have No Photo at All
If no photograph exists — only memory and whatever former teammates can recall — the process changes but does not stop.
Start with your school colors, which are often documented on the school district's website or in any archived athletic program. Then reach out to former teammates directly. In our experience, at least one person in any group of four former players has either the jersey itself, a usable photograph, or enough specific recollection to fill the gaps you cannot close on your own.
If the jersey must be rebuilt from memory alone, treat it as a tribute to the original rather than a precision-matched rebuild. Anchor the elements you remember with certainty — the number, the color, the general lettering style — and let the remaining details be deliberate choices rather than guesses. A jersey that captures the feel of what you wore is still worth having, and worth wearing.
Step 5: Review These Four Things Before You Confirm the Order
This is where single-jersey orders most commonly go wrong. The preview looks close enough, you confirm, and the physical jersey arrives with the number sitting lower than expected or a sleeve stripe in a slightly different shade than the screen suggested.
Before you submit your order, check these four things specifically:
- Number placement on the back. On most baseball jerseys, the back number sits centered horizontally and approximately one-third of the way down from the collar. Verify this against your reference before confirming.
- Name-to-number spacing. The gap between the bottom of the name strip and the top of the number is typically half an inch to one inch. Too much space reads as off. Too little looks crowded.
- Stripe alignment. Sleeve stripes should run parallel to the sleeve hem, not at an angle. If the preview shows angled stripes, that is a template error — flag it before the order goes to production.
- Color in production versus color on screen. Screen rendering is not production color. If you have any uncertainty about a shade, ask for a previous production sample or physical swatch before confirming. A quality provider will accommodate this without friction.
If your platform allows it, order a single jersey first — even if two or three former teammates have expressed interest in getting one as well. One jersey lets you verify the physical result before committing to more. The per-unit cost is higher on a single order, but it is the right structure for a project where the details are the point.
Your jersey is still out there waiting.
Design yours in minutes and see your name and number exactly the way you remember it.
Frequently Asked Questions
Can I accurately rebuild my jersey design from a single blurry photograph?
Yes — one photo is enough if it shows the front or back of the jersey with the chest lettering and number visible. Work from what is clear. If the number is readable but the chest text is not, rebuild the number faithfully and use teammate recollection or your own memory for the lettering. Blurriness matters less than detail — even a low-resolution or overexposed image typically reveals color, font weight, and stripe configuration when you zoom in and examine it carefully.
What is the difference between sublimation printing and tackle twill, and which one matches my original?
Sublimation prints the design directly into the fabric using heat and dye — the result is smooth and flush with the surface, because the design becomes part of the material rather than sitting on top of it. Tackle twill cuts individual letters and numbers from fabric and sews them onto the jersey, producing a raised, textured surface you can feel with your fingers. If your original jersey had raised lettering, it was tackle twill. If the lettering was flat and smooth to the touch, it was printed or sublimated. Most high school programs through the 1990s and early 2000s used tackle twill; sublimation became standard in high school uniforms after approximately 2010.
How do I identify my school's specific number font if I cannot find any photographs?
Start with the four most common high school baseball font categories: varsity block, shadow block, Old English, and collegiate arch. These four account for the substantial majority of American high school uniform lettering from the mid-1980s through 2020. If you remember whether the numbers looked plain and thick, had a shadow offset behind them, resembled old newspaper masthead lettering, or sat inside a slight curve, you can place yourself in the right category quickly. A custom jersey platform with a proper baseball font library will offer multiple variations within each category, and you can select the closest match from there.
Do custom jersey providers require a minimum order, or can I order just one jersey?
Minimum quantities vary significantly by provider. Platforms built for individual custom orders — as opposed to bulk uniform suppliers oriented toward team managers — typically allow single-unit purchases with no minimum. If you are rebuilding one jersey for yourself, look specifically for platforms that list single-unit pricing rather than per-unit pricing with a quantity break. The cost per jersey will be higher than bulk pricing, but the option to order exactly one is the right structure for a project where you want to verify the physical result before ordering more.
How long does production take for a single custom baseball jersey?
For a single custom jersey with standard construction and no unusual specifications, most production timelines run seven to fourteen business days from design confirmation, with standard shipping adding three to seven days depending on your location. Rush production is available from most providers at a premium — typically two to five business days in production. If you are ordering for a specific occasion, build in at least three full weeks from order confirmation. Production timelines can extend during peak demand periods, particularly in early spring when custom jersey volume rises sharply with the start of the baseball season.
See also: personalized sports gifts vs. generic alternatives | what to do with your old varsity letter jacket | jersey size chart to get the numbers right | how to create a custom sports shadow box