How to recreate a high school jersey is a question that sounds simple right up until you sit down to actually do it — and discover that the design living in your memory for the past two decades has gaps you didn't know were there. The number is sharp. The school colors feel obvious. But the font style? The exact shade of that blue? Whether the side panels were solid or striped? Those details blur, and that's exactly where every other guide stops helping.
This one doesn't stop there.
We're going to walk through the complete process — from the memory reconstruction work that has to happen before you open any design tool, through the licensing question most guides never mention, all the way to proof approval before your order goes to production. Every step is written for the specific challenge former athletes face: rebuilding a jersey from fragments of memory, old yearbook photos, and whatever a former teammate still has buried in their garage.
Why Most Jersey Recreation Guides Miss the Point
The typical tutorial on custom jersey ordering assumes you're starting with complete information. You have a Pantone color. A clean vector file of the logo. You can articulate every design element with precision because you're building something new, not reconstructing something old.
That's not the situation you're in.
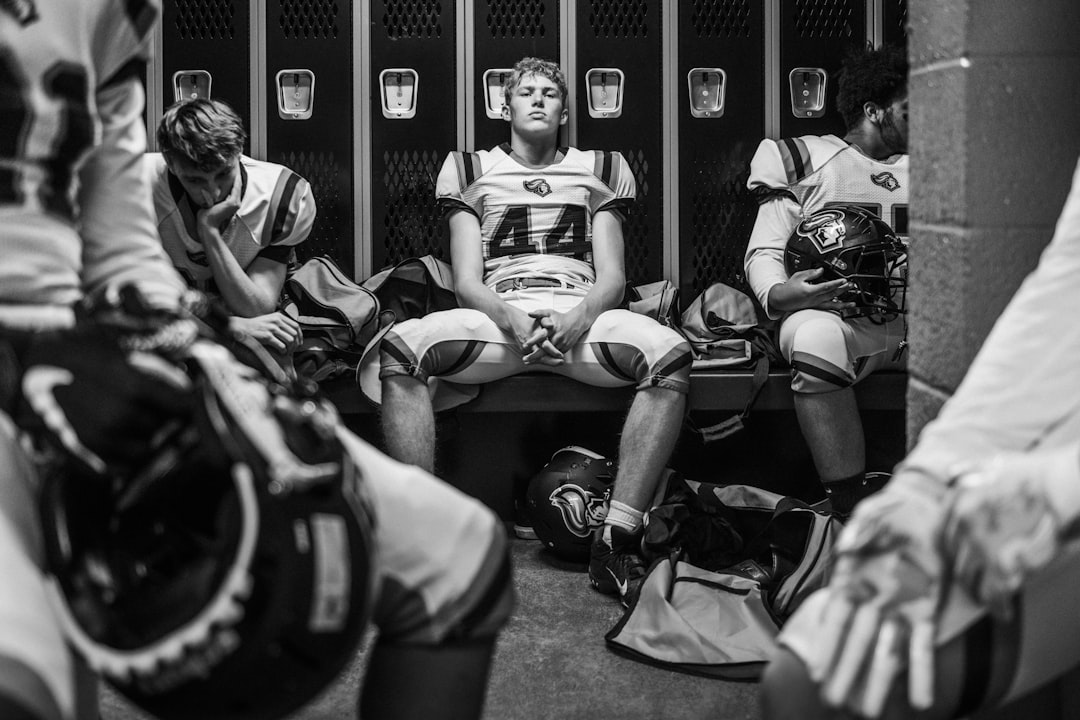
You're working from a mental image that's been sitting in storage for fifteen to thirty years. Maybe you have one yearbook photo where the jersey is partially visible. Maybe you have nothing but your own recollection. You're certain you know what it looked like — but translating that certainty into specific design decisions is harder than it sounds. Was the lettering outlined or solid? Was the number the same color as the stripe on the sleeve, or a shade lighter? Was the name on the back stitched or printed?
This is the actual starting point for the process of recreating an old team jersey. It begins with memory archaeology, not a color picker. Get the reconstruction phase right, and the design work is almost easy. Skip it, and you'll spend three revision rounds chasing approximations that never quite land.
Step 1: Do the Reconstruction Work Before You Touch a Design Tool
The single most reliable way to end up with a jersey that's almost right — but not quite — is opening a custom builder before you've gathered your reference materials. You start locking in guesses, and every guess compounds the next one. The right sequence is reconstruction first, design second, always.
Pull together every physical reference you can find.
Yearbooks are the natural starting point. If yours disappeared somewhere between college and your third apartment, most public libraries hold local yearbook archives, and a growing number of schools have digitized collections going back thirty or more years. A search for "[Your High School Name] yearbook archive" surfaces usable results more often than you'd expect. Prioritize action photos over formal team portraits — game photos show jerseys under real lighting, from multiple angles, with lettering stretched across an actual moving body rather than posed flat.
Other sources that consistently produce results:
- Digitized local newspaper archives (Newspapers.com covers a substantial portion of regional papers going back decades, and game coverage from that era often included photos)
- Your school's athletic department — alumni requests for historical photos are common enough that many schools maintain files specifically for this purpose
- Former teammates through Facebook alumni groups or class reunion pages — someone almost always has something
- Old game recordings on VHS or DVD; even low-resolution footage gives you color temperature and lettering proportions that still photos sometimes flatten or distort
Write your memory down before you look at anything external.
Before you open any yearbook or pull up any photo, take five minutes and write down every detail you actually remember. Number. Number color — matching the jersey base or contrasting? Chest lettering — school name, mascot name, or abbreviation? Was your last name on the back above the number or below? Any stripes or piping on the sleeves or sides?
The reason to do this independently first is memory contamination. The moment you see a reference image that has a single detail slightly wrong, your memory begins accommodating it rather than correcting it. Your written recollection and the visual evidence need to be compared side by side — not allowed to merge before you've captured what you actually remember.
Make a list of what you genuinely cannot confirm.
After you've written your memory down and compared it against your references, you'll have two clear categories: confirmed details and open questions. The open questions list matters as much as the confirmed details. It shows you what still needs research — and it marks the places where you'll need to make a deliberate creative decision rather than a factual one.
Step 2: Get Your Colors as Specific as Possible
School colors are more complicated than they appear. What your brain stores as "red" might have been crimson, scarlet, cardinal, or a warm brick red that predates any of those standard names. What you remember as "gold" might have been old gold, Vegas gold, or a specific yellow that doesn't correspond cleanly to any current Pantone reference. Once fabric swatches are in front of you, the difference between these shades is immediately visible.
Start with your school's current official colors as an anchor point — not the final answer, but the closest verifiable baseline. Most schools publish color information in their athletics or brand guidelines documentation, accessible through the school website or a call to the athletic office. If the school has updated its color system since you graduated (this is more common than you'd expect), those current codes are still useful as a starting point to react against.
Compare those codes against your reference photos. If you have a yearbook scan at reasonable resolution, uploading it to Adobe Color will extract approximate hex values from the image. The translation from print to digital isn't exact, but it tells you reliably whether you're looking at a warm red or a cool one, a blue-leaning navy or a purple-leaning one — which is often the distinction that matters most.
Before you finalize any color decisions, settle this question: are you recreating a precise historical replica, or an inspired-by version that captures the feel without requiring documentary accuracy? The exact replica path rewards more research time and delivers the result that stops a former teammate cold when they see it. The inspired-by path moves faster, accommodates gaps in your research, and still produces something with genuine emotional weight. Decide now, because the answer shapes every step that follows.
Step 3: Work Through the Licensing Question Before You Order
Most recreation guides skip this entirely. It takes less than ten minutes to address, and it's worth your time.
If your original jersey featured a formally trademarked mascot graphic — a professionally designed image your school registered — exact reproduction on a custom jersey can create complications. For the majority of high school mascots, this is a non-issue. A generic hawk silhouette, a stylized letter, a simple athletic illustration of a warrior or a bear — these are typically original enough that personal-use alumni recreation doesn't raise concerns.
The area that warrants attention is exact file reproduction of a logo your school has formally protected. If you're uncertain whether yours qualifies, a call to the athletic department usually resolves it quickly. In our experience, most schools respond cooperatively to alumni requests — they'll either give informal clearance or point you to the official graphics file used for alumni merchandise.
When working with a custom jersey builder, describing the style of a mascot rather than submitting a copied image file gives the design team room to render something original that captures the look without reproducing a protected asset. "A side-profile eagle with wings partially extended, flat athletic illustration style, in school colors" is more useful — and cleaner — than uploading a screenshot.
Step 4: Choose Between Exact Replica and Inspired-By
With references gathered and licensing understood, you face the design decision that determines everything downstream.
The exact replica path means matching every recoverable detail — confirmed font, verified color codes, precise element placement, the same construction method the original used. Done right, it produces the result that makes someone who played with you stop and say "that is exactly it." It requires more research time and more back-and-forth on design proofs. It's the right choice when the jersey is meant to be a meaningful artifact: something framed, something worn to a reunion, something given to a parent who kept every program from every game.
The inspired-by path means capturing the character — your number, your name, your school's palette, the general feel of the lettering — without requiring historical precision. It's faster to execute, more forgiving of gaps in the research, and still produces something that carries real emotional resonance. For anyone who won't be holding it next to the original for direct comparison, the difference is minimal.
Neither path is wrong. The right one is determined by what this jersey is actually for.
One Athlete's Reconstruction
Maria T., 38, spent nearly three weeks gathering references before she placed an order for a custom replica of her high school volleyball jersey from central Ohio. Her only starting point was a single team photo from the 1999–2000 yearbook — a group shot where the jerseys were visible but small. The school's athletic director had no records going back that far. A post in a Facebook alumni group brought three responses within a day, including one former teammate who still had her original jersey in a storage box. Two phone photos from that box revealed the exact shade of teal the school had used — a color since replaced when the program updated its branding — and gave Maria a clear view of the chest lettering construction. Her finished jersey was close enough to the original that the teammate who sent the photos teared up when she saw it. The research phase felt slow at the time. Looking at the result, it didn't feel slow at all.
Step 5: Build the Design
This is where the preparation work pays off in full. Because you've done the reconstruction before opening any tool, you're making informed decisions instead of calculated guesses.
When working with a custom jersey builder, have these ready before you begin:
- Your reference images — uploaded or described clearly to the design team
- Your written notes — confirmed details and open questions both included
- Your color references — hex codes, Pantone numbers, or the most specific color name you've been able to confirm
- Your font description — block, outlined block, athletic script, or a character description drawn directly from your reference photos
On fonts: Most custom builders carry the standard athletic font families that covered the majority of high school programs through the 1990s and early 2000s — Varsity, Athletic, and collegiate block variations are the most common. Describe the character of the lettering from your reference and a good design team will offer options that land close. Your recognition will be faster than your description: you'll know the right one when you see it.
On the proof: Every reputable builder provides a design proof before production. Compare that proof directly against your reference photo before approving it. Differences in letter spacing, outline weight, or number placement are visible at a glance when the proof is held next to a reference — and they are the difference between "that's it" and "that's almost it."
Step 6: Finalize and Order
Before submitting a final order on your custom replica high school jersey, run through this check:
- Number style and placement confirmed against your reference material
- Name spelling verified — the most common single error in custom jersey orders, and one of the most frustrating to receive
- Colors confirmed against research, not just the on-screen preview (request fabric swatches if you have any uncertainty about a specific color)
- Font and lettering style signed off on the design proof
- Size decided — high school jerseys were often worn with an intentionally loose fit; choose whether you want that same silhouette or a contemporary athletic cut
Standard production for a single custom jersey runs 7–14 business days after proof approval at most builders. Rush options compressing that window to 3–5 business days are typically available if you're working toward a specific date.
Troubleshooting: When the Details Stay Out of Reach
Sometimes the reconstruction work hits a genuine dead end. Photos are too dark to read. No teammates respond. The school has nothing. Here's what to do:
Colors unconfirmable: Order fabric swatches in the two or three closest options before committing to full production. Physical fabric compared against memory is more reliable than any monitor calibration.
Font unidentifiable: Describe its character — condensed or wide, with or without outlines, serif or sans — and ask the design team to present two or three options. You will recognize the right one on sight even without being able to name it.
Logo or mascot unrecoverable: Build the jersey without it. Your name, your number, and your school's colors in the right lettering style carry substantial emotional weight on their own. The mascot was set dressing. The human details are what you actually wore.
Your jersey is still out there waiting.
Design yours in minutes and see your name and number exactly the way you remember it.
Frequently Asked Questions
Can I get a copy of my high school jersey if I have no photos of the original?
Yes — and more former athletes are in this position than you'd expect. Before consulting any external source, write down everything you remember. Then contact your school's athletic department, search digitized local newspaper archives, and post in alumni or class reunion groups online. Former teammates are consistently the fastest source of usable reference photos. If nothing surfaces, describe your memory in detail to a custom builder's design team and work from there. The result will be inspired-by rather than exact, but it will still be genuinely yours.
Is it legal to recreate your high school jersey for personal use?
For personal use — wearing it, displaying it, giving it as a gift — recreating a jersey with your name, number, and school colors is generally unproblematic. The area requiring more attention is exact reproduction of a formally trademarked mascot graphic. When uncertain, contact your school's athletic department before submitting any logo file to a builder. Most schools are cooperative with alumni and will either grant informal clearance or provide an official file.
What's the difference between tackle-twill and sublimation for a recreation?
Tackle-twill is the traditional construction where letters and numbers are cut from separate fabric and sewn directly onto the jersey surface, producing the raised, textured finish that was standard on most high school jerseys through the early 2000s. Sublimation prints colors and graphics directly into the fabric — vivid and durable, but flat rather than raised. For a recreation that matches the physical feel of what you wore in the 1990s or early 2000s, tackle-twill or screen printing is typically the closer match. For a version that prioritizes color accuracy over historical texture, sublimation is often more cost-effective for single-piece orders.
How do I find my school's official colors from that specific era?
Start with your school's current athletics documentation for a baseline, then cross-reference against reference photos using a free color extraction tool like Adobe Color. For historical accuracy, former teammates currently connected to the program and digitized local newspaper archives from that era are the most reliable sources. School colors shift more often than most people realize — getting confirmation from someone who was there is worth the extra step.
See also: personalized sports gifts vs. generic alternatives | how to create a custom sports shadow box | tracking down your old high school sports stats and records | what to do with your old varsity letter jacket | jersey size chart to make sure the fit is right